


[in progress]
Rectangular construction makes efficient use of fabric, but it drops seams all over the place. So unfashionable. Instead, a number of cultures–the Chinese, the Mongols, and the Ottoman Turks among them–use a style of construction that wastes fabric, but moves the seams to the periphery of the garment. This construction method occurs frequently among cultures that use a lot of silk, so I call it “silk construction.”
[image]
The goal of silk construction is to maintain unbroken expanses of glorious, glorious fabrics. Compromises must be made, of course. The width of a bolt of couture silk was about 117 cm, or 46 inches–not nearly enough for the full width of a kaftan. To make matters worse, the large scale of court-worthy brocade patterns made it absolutely essential to match the pattern perfectly in places where it would be noticed… but matching a large pattern is fabric-intensive. The bigger the pattern, the more random scraps you end up with. And if the pattern has an up and a down, at least once you’re going to stamp your feet and cry.
The Ottomans managed by prioritizing. Top priority: the midline. Center the pattern across the back. In the front, match the pattern across the right and left flaps from collar to waist, and match the seams where the front gores attach to the front panels. Make these parts of the kaftan match even if you’re left piecing the rest of it out of scraps.
Second priority: The upper sides of the sleeves. They’re very visible, and when they’re extra-long, they’re also a status symbol. For long sleeves, center the pattern on the top fold, so that when the sleeve is worn, the main motif runs down the outside of the arm. For short sleeves, make sure the pattern is right-side-up on the front of the sleeve, and try to make the left and right sleeves match. If you don’t have enough fabric to make the entire sleeve out of one continuous piece, make the upper/outer side out of one piece and make the fiddly, curved bits under the arm out of scraps.
Third priority: The seams where the skirts’ side gores are sewn to the front and back panels. These spots are moderately visible, so match them if you can. If you can’t match all of them, at least try to have one matched pair and one unmatched pair. It’s your choice whether to put the matched pair on the front or the back; extant garments do it both ways.
Fourth priority, by which I mean no priority at all: The outer corners of the skirts and under the arms. Once you put the kaftan on, even you won’t be able to see if the pattern doesn’t match. Heck, don’t even keep the pattern right-way-up if you don’t want to.
So how did the Ottomans manage these priorities while crafting too-narrow bolts of silk into garments fit for the richest man in the western hemisphere? With a method you’ve tried hard to unlearn: the T-tunic cut.
This is a conceptual exercise. Don’t use real fabric to do it! Use the width of your fabric to determine where the seams should fall, then make a pattern and use that to cut your fabric.
First, draw the outline of the kaftan:

The front and back profiles of a kaftan are identical. The only difference between the two sides is that the front is slit up the middle, and two triangular gores are inserted to create overlap. This makes cutting the front trickier, so I’ll start with the layout of the back.
Laying Out the Back of the Kaftan
Lay the bolt of fabric down the center of the outline. If the pattern has a large main motif, center the motif on the upper back.
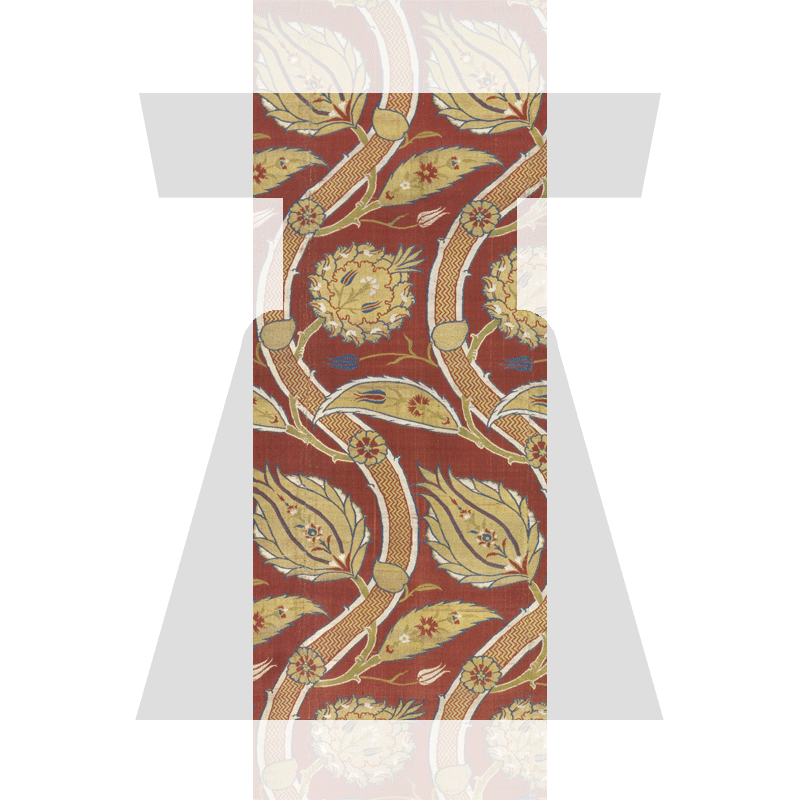
Trim away the extra. You’re left with missing bits around the edges of the pattern.
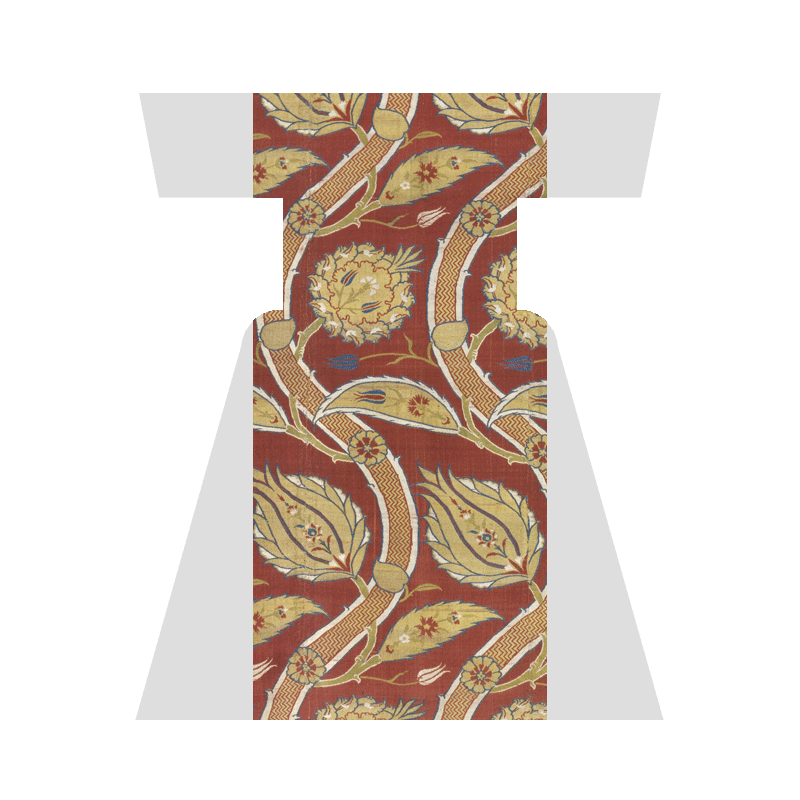
Fill in the missing bits with leftover yardage.
Filling in the missing skirt gores exercised the ingenuity of Ottoman tailors. They preferred to cut the gores in one piece and match the pattern at the seams, but when there wasn’t enough fabric, they made it work.
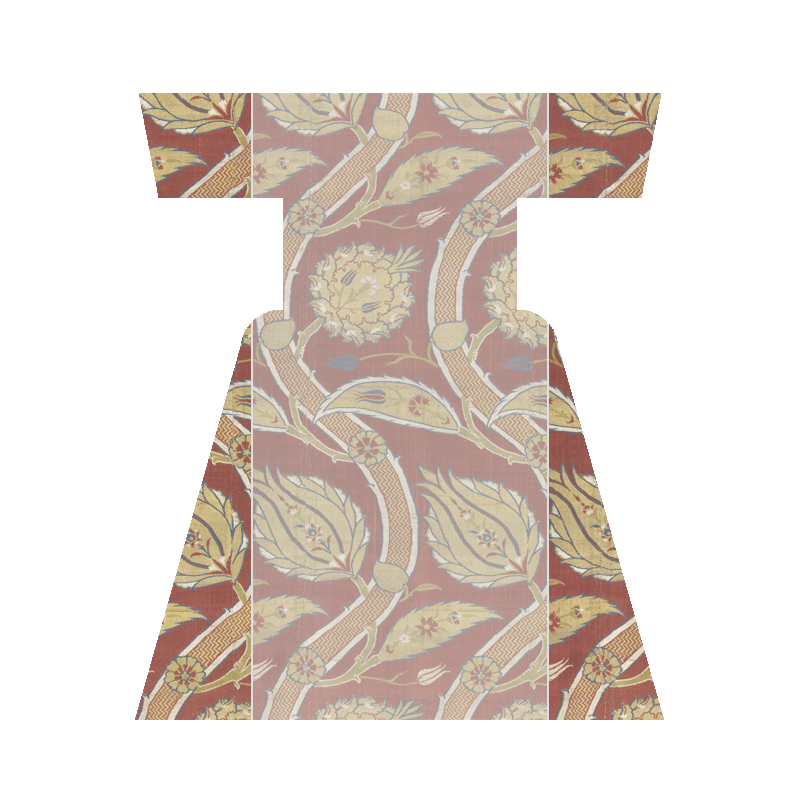
The sleeves were just as great a challenge. For short sleeves, most of the sleeve is a single piece of fabric, folded so the pattern is upright on the front and upside-down on the back. However, the curve of the armpit and upper waist means that the neatly rectangular sleeve piece has weird concave triangles stuck onto the inner corners…
[image]
…and when you have a limited supply of fabric that’s worth more per ell than you are,1 cutting those triangles as a piece with the rest of the sleeve wastes an unconscionable amount of fabric.2 So you get creative.
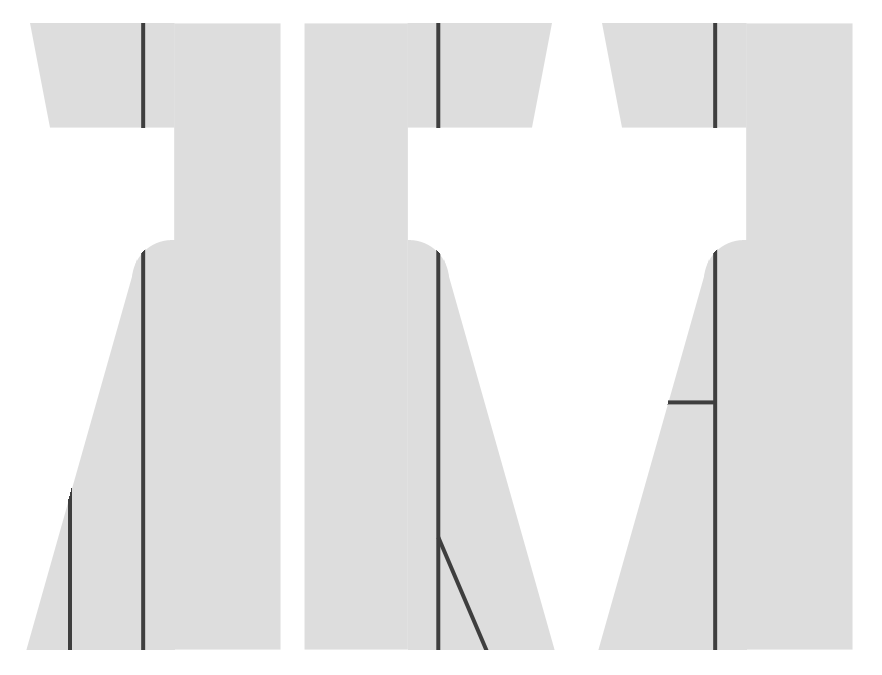
Once you’ve jigsawed the skirt into shape, you’re done with the back of the kaftan.
A note before we move on to the front: You have leeway in deciding the placement of the sleeve and hip seams. It’s more efficient to have them fall in line with one another and the edge of the bolt of fabric, but the court tailors moved the seams out of alignment at will. They might bring a seam in a little to improve structural soundness, to make pattern-matching easier, or to prevent a shoulder seam from falling too far down the arm.
Personally, I set the shoulder seam even with the widest part of the torso and the hip seam even with the base of the hip humps. It’s the most structurally sound location for the seams, and when you’re still tinkering with the optimal sleeve width, not having the base of the sleeves cut as a piece with the torso gives you greater latitude for experimentation.
Three principles to observe:
- The front and back hip seams don’t have to match.
- The front and back sleeve seams DO have to match. The sleeve needs a straight edge to attach to.
- Don’t cut the entire sleeve as a piece with the torso. You’ll end up with a seam down the outside of the sleeve–so unstylish.